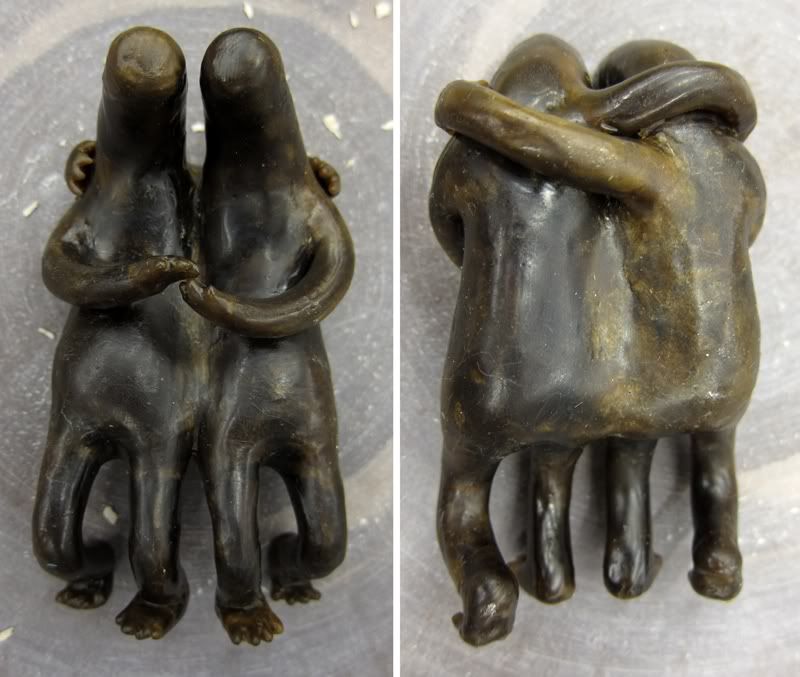
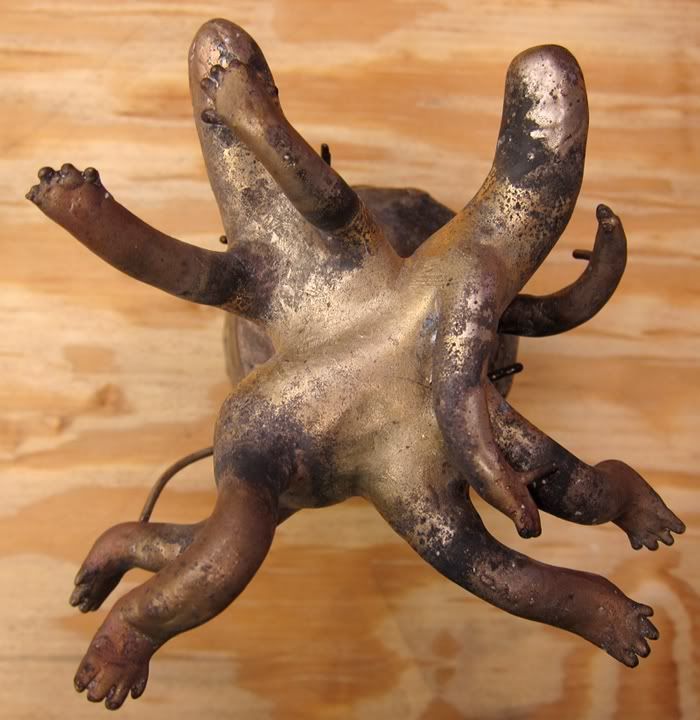
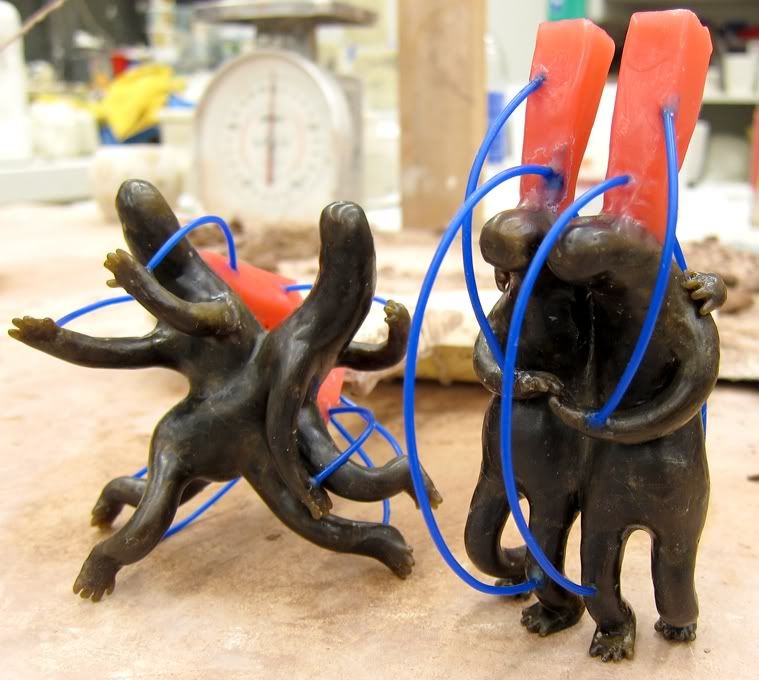
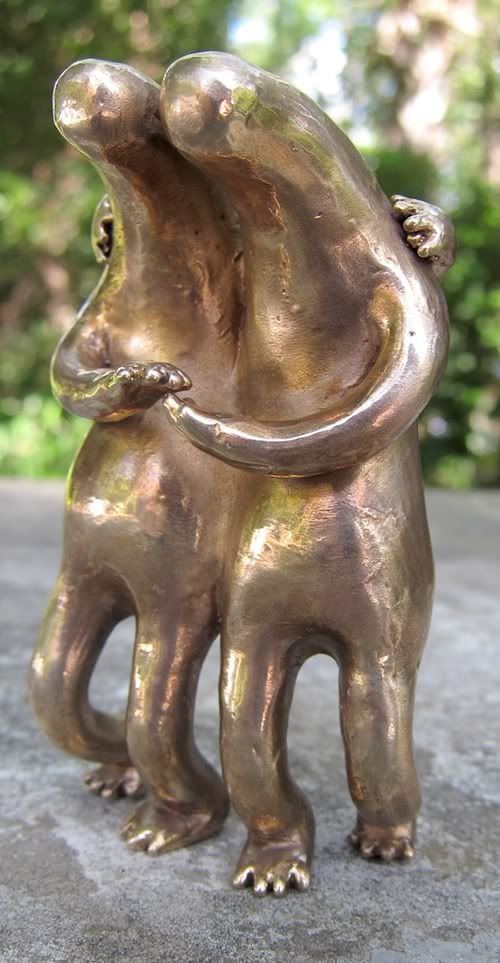
Archive

Thursday, April 28, 2011

Bronze twin crystals; (nearly) finished!

Penetration Twins

Contact Twins


Ta-daaaa! My bronze sculptures of the twin crystals have reached the near end of this journey, with the exception of some extra polishing in the near future. The gates were cut, their bodies were filed and grinded and polished, and here they are! A little rough, but I like crystalline/mineral-like textures that arise in the casually filed appearance.

I didn't paint the faces on, because I thought adding the other medium to the bronze would feel disconnected. They don't really need faces either; I like considering them as creatures in the past who are now solidified in this crystal-like material and are more so objects or minerals rather than organisms. I'm considering carving little wooden masks for them, but that won't be any time soon if I choose to do so.

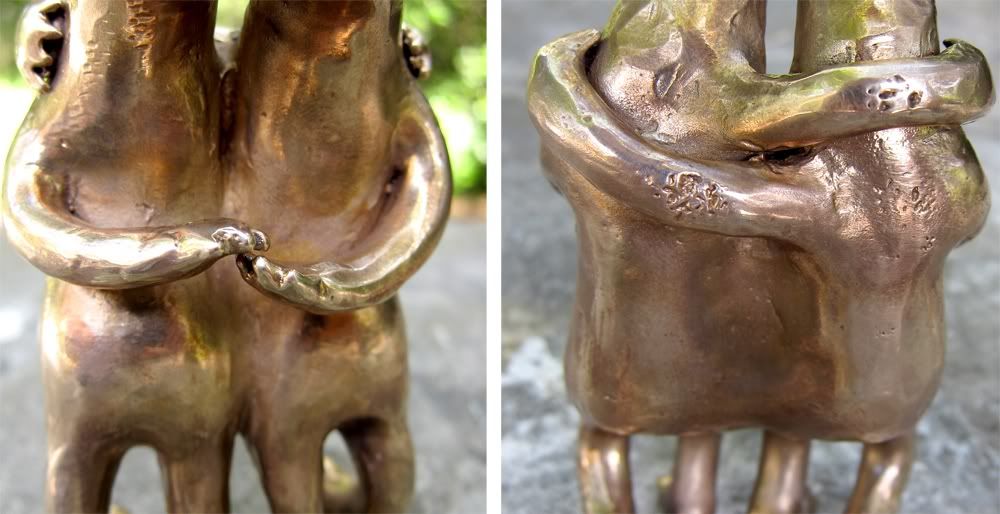
Detail of contact twins, best friends.

Pho Monster in the graffiti tunnel!

I got bored Monday night, because I had just finished my last class of the year and everyone else was studying for shit and I just wanted to go out and do something fun to celebrate!


So I decided to do my first paint job in the graffiti tunnel on campus that night. I've never really painted with spray paint before, except for a little practice run when I first got my set of paints, so this is definitely a new and unfamiliar medium for me. It was really fun, and I was painting next to a guy who was tagging the tunnel, and he was pretty neeaaaattt. We ended up talking quite a bit, so now I have a graffiti friend I guess, lolololol.

I painted the pho monster, blue, just because I had a lot of blue.

It took longer than I think it should have, but for a first go, I think it was pretty good! Next time I'll understand layering better, and what should come first in terms of colors and the overlapping of features. The nose was a good moment for me.

Next time, I'm throwin' up a sloth. Slothz 4 lyfe!!

Sweet potato noodles with shiitake and tofu!


AHH, I wish I took note of this recipe, wrote down how much I used of each ingredient, because it was SO GOOD! I love Dangmyeon, or sweet potato noodles (or cellophane noodles, or glass noodles), because they're clear and fun to eat and so delicious. I made this dish pretty quickly, and I'll try to replicate it later and post a recipe.

I haven't posted recipes in the past because I think of my food posts to be more along the lines of food inspirations..rather than recipes. Meaning that I hope whatever it is I cook and post more so inspires the mixing of flavors, techniques in how to cook an ingredient and what order to cook it in, etc. Rather than saying this is what I made and this is how you can make it!


Oh man, don't get me wrong, I love to follow a good recipe, but more recently I've been looking at recipes just for the sake of getting inspiration. I'll look at a pad thai recipe and see what's used and in what amounts for the sauce, and what's cooked in what order, but aside from that I eye ball it and use only what I have on hand instead of going out to buy a certain rice wine or whatever the recipe calls for. But if I'm looking to make something traditional, such as kimchi or tom yum goong (veganized), then I'll definitely follow a recipe.

SORRY FOR THE LONG EXPLANATION!

Ok, so the sauce base for this was soy sauce, miso paste, rice wine vinegar, and some shiitake broth that I gathered after soaking dried shiitakes, and a little drop of hoisin, I think. I first fried the tofu in oil till golden brown, then added the shiitake mushrooms and onions, fried it a bit more, and then added some sauce to simmer a bit. I cooked the noodles, threw em' in the pan, some more sauce, simmer doowwnnnn, and DONE.


A very light, sweet and seaweedy salty flavor, but the shiitake definitely plays a big role in this dish.

Wednesday, April 27, 2011

Brown rice cakes and Sweet Potato; so easy, so good!


My Korean friend had me and some other friends over for dinner one night to show us some Korean cooking. It was really awesome, because not only was the food mega delicious, but it was also all very easy to make! She made one dish using rice cakes and chili paste, which I've been making on my own very frequently. When she made the dish, she used a sweet rice drink as the base fluid, then let it simmer with some chili paste to form a thick sauce, and then cooked the rice cakes in it.

I've been kind of experimenting with this format; using other ingredients such as spinach and hoisin (mainly because I don't have the rice drink she used to sweeten the sauce), but the other day I decided the try yo throw in a few small cubes of sweet potato, thinking the extra sweetness would work well in an already sweet and spicy dish. It was AWESOME! So I'm going to try to wing it and remember how the recipe went:


Brown rice cakes and sweet potato in chili paste

1/2 cup water
1 tablespoon hoisin
4 tablespoons chili paste
1/2 cup sweet potato, cubed
1 and 1/2 cups of rice cakes (any shape)


So you just mix the water, hoisin, and chili paste in a sauce pan and let that simmer a bit on medium/high heat.

Add the sweet potato cubes so they soften and absorb some moisture from the sauce. If it looks like the sauce is getting too thick, add maybe 2 tablespoons more water. The sweet potato will soak up some moisture, and you'll need to reconstitute that moisture for the rice cakes to suck upppp.

When the potatoes seem soft enough, to your likings of course, add the rice cakes, brown or white, and cook just a bit longer, until they become soft. Rice cakes cook really fast, so probably no more than 5-8 minutes.

Done!

Szechuan inspired potato and eggplant dish!


Somewhat loosely inspired by Szechuan flavors, the sauce is chili paste based and thick, with a hint of sweetness. Eggplant, Yukon golden potatoes, carrots and Shiitake mushrooms. On the side are some udon noodles with chili powder and dried seaweed. The two items actually went together very well! Successful dinner!!

Monday, April 18, 2011

Lots of heads and arms doodle?

Ah, uhh, eww..

Crystal creature doodle!

Aww.

Bronze pouring!!

BRONZE POURING! Our final metals project was a bronze pouring, which I was really excited about! I think I spent more time on this project than any other project this semester, maybe even this entire school year. The process required a few very time consuming steps.

STEP 1
The first step was carving our objects out of wax in order to create a cast to pour the bronze in. For this project, I decided to translate my illustrations of crystal twins into bronze figures. The carving process took a while, and I was being a bit crazy about getting the figures as smooth as possible.

Penetration twins in wax

Contact twins in wax


STEP 2 The second step was to gate my creatures. There were larger, red wax-gates attached to the forms to allow the bronze to pour in, and smaller blue lines of wax to reach smaller parts of the creatures bodies, such as the extremities, especially the little toes. After this we attached the forms to cups by the gates, which is where the bronze would be poured into.

Accidentally over gated the contact twins, so I just removed the blue lines that were attached to the front and back legs.

STEP 3 The final step before the pour involved dipping the gated wax sculptures in some sort of crazy toxic-lime green fluid, a type of silica, to create a ceramic shell around the objects. We had to dip it in the silica, then dip it in a certain type of sand, then let it dry completely and repeat the process a total of 8 times. This took a ridiculously long amount of time. After each dip the wait ranged from 30 minutes to 2 hours before the next dip could occur.

STEP 4
Pouring bronze!! The sculptures were put in a kiln and heated until all the wax melted out. The the ceramic shells were transferred to sand pits, and the bronze was poured! It was really amazing to watch molten bronze being poured.

Sand pits! Someone's mold cracked unfortunately. One of my little guys was in the black pit on the right.


STEP 5
BEAUTIFUL! Once the bronze cooled, I cracked open the mold and picked away all the remaining silica mold to reveal my beaaauutifuull crystal twins. Thank goodness they didn't look like doo-doo!

Penetration twins in bronze

Contact twins in bronze, and contact twins cooling off while still in the silica mold. The toes!


The rest of the process will be posted later this week or next week. It'll involve removing the gates, sand blasting, and polishing, as well as any other touch up work and detailing!

My first ceramic creation!

Baby's first ceramic piece! I've been getting to know the ceramicists a lot better due to midnight cookie drop offs and late nights working on my bronze project. I love the ceramicists, bless their hearts!!

Anyway, so one of them taught me how to throw, and I made this little cup/bowl thing!! It still needs to be fired with the glaze on it, which should happen soon, but here it is before the first firing and before the color was added. The little drawing was done using the sgraffito technique.


All the ceramists have been helping me with the steps and giving me advice during this process,
so thanks guys, ya'll the best!

Chili fried tofu outside the bento box!


It's basically the same as my previously posted bento box lunch, but with some eggplant cooked with the bok choy!
Sometimes (most of the time) all I cook is Asian foods.

Chili fried tofu bento box!


My favorite lunch evvveerr.

Dry fried some more tofu and then marinated it in a chili sauce I made, ontop a bed of brown rice. Sauteed some bok choy in garlic, olive oil, chili flakes, and a little bit of soy sauce. Little tomato and onion salad next to that, garnished with cilantro, olive oil, lime, pepper, and paprika. Second box just has some snacky things in it; oranges, raisins, almonds, cashews, and pumpkin seeds!

Saturday, April 2, 2011

Chili lime fried rice!


This actually ended up being really good, considering I wasn't really knowing what I was making!

I dry fried some tofu and let it sit in a container of red chili paste, soy sauce, lime, garlic, and water. Then I used some of the sauce from the tofu to cook a few slices of eggplant and broccoli. Once the eggplant and broccoli was done, I removed it from the pan, and fried the chili and lime-soaked tofu. Removed the tofu from the pan, fried the rice with a little bit of oil and sauce, then re-added the tofu, eggplant, and broccoli. Cooked for a little bit, then plated it and garnished with fresh lime, cilantro, and peanuts.